Large medical equipment often requires plastic enclosures that combine a substantial exterior surface, a professional appearance, structural support, and access for internal components. However, developing a large enclosure through injection molding can involve significant upfront tooling investment, particularly when the design includes complex geometry, multiple molded features, and demanding dimensional requirements.
For medical device manufacturers developing new products, launching a specialized equipment platform, or producing a limited number of units, the challenge is not simply finding the lowest-cost manufacturing process. It is choosing a process that balances tooling investment, part quality, production volume, and long-term manufacturing costs.
Large plastic enclosure manufacturing does not always require injection molding. Depending on the enclosure geometry, material requirements, and expected production volume, thick-sheet vacuum forming combined with CNC trimming and secondary assembly may provide a practical alternative.
This guide explains why large enclosure tooling can be expensive, when vacuum forming is worth evaluating, how it compares with injection molding, and what information a manufacturer needs to recommend a suitable production process.
1. Why Is Tooling Expensive for Large Plastic Medical Enclosures?
The cost of manufacturing tooling depends on more than the outside dimensions of a part. Enclosure geometry, surface quality, dimensional requirements, material selection, and expected production volume all influence the investment.
Large mold dimensions increase manufacturing complexity
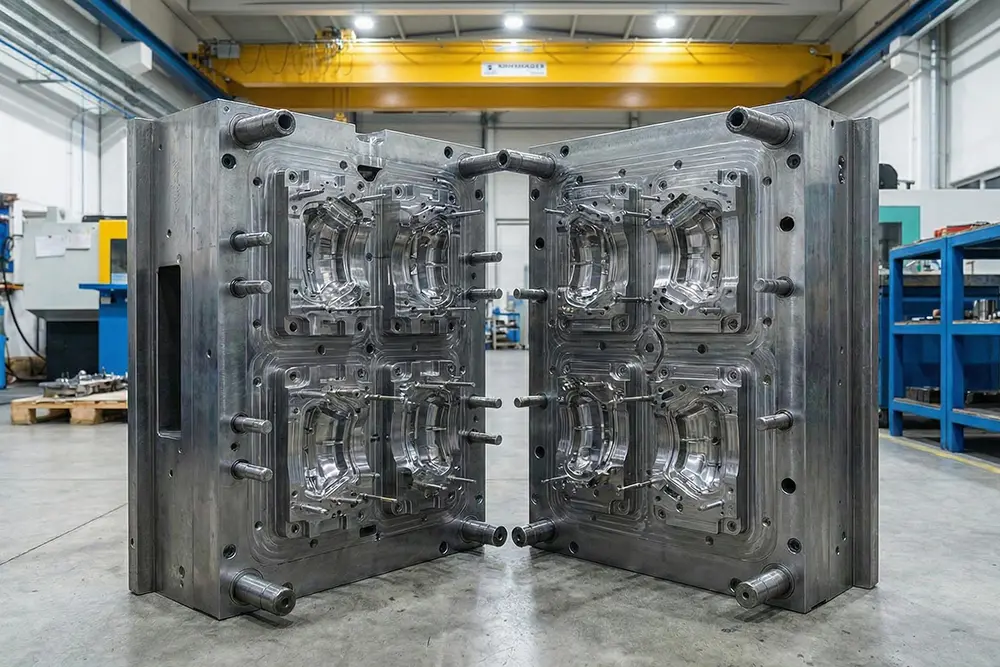
An injection mold must contain the cavity and core that define the part geometry. Depending on the design, it may also require cooling channels, runners, ejection mechanisms, slides, lifters, and other components.
As the enclosure becomes larger, the mold may require more material, machining time, handling capacity, and a larger injection molding machine. These requirements can significantly increase the initial investment.
Complex features require more mold engineering
Medical equipment housings may include mounting bosses, internal ribs, screw connections, ventilation openings, connector interfaces, cable passages, and integrated fastening features.
When these details are molded directly into the enclosure, they can increase mold complexity. Undercuts, side openings, and other features may require additional mechanisms or specialized tooling.
Not every feature needs to be molded into the main shell. Separating the cosmetic housing from the structural frame or using secondary machining and assembly can sometimes simplify the tooling strategy.
Cosmetic requirements can affect tooling decisions
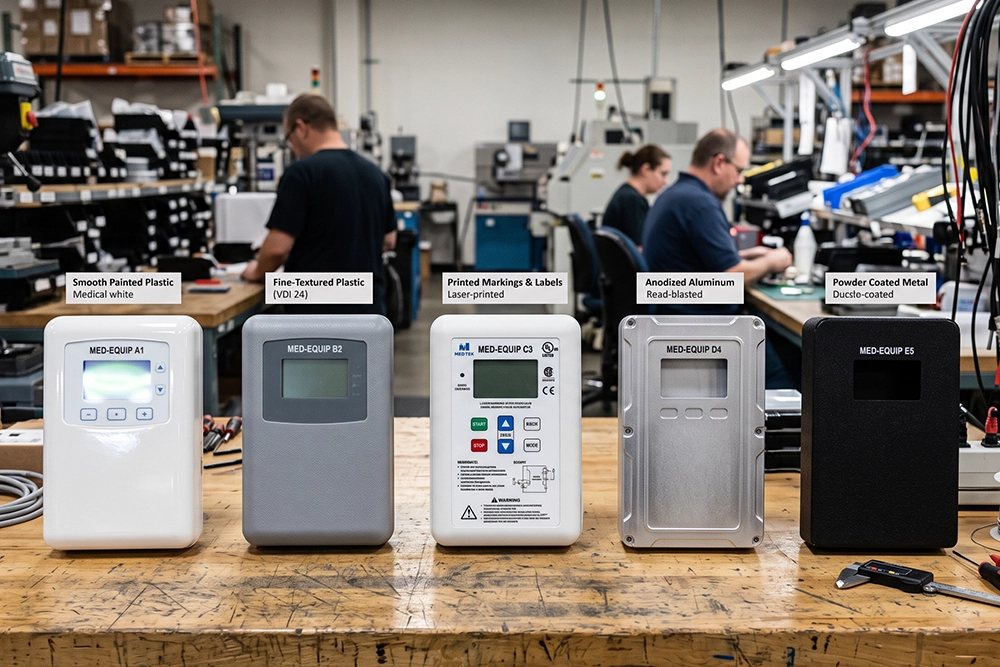
Large visible panels often need consistent color, smooth surfaces, controlled parting lines, and an appearance suitable for professional healthcare environments.
If the enclosure has a large Class-A-like cosmetic surface, the manufacturer must consider the mold finish, material behavior, forming marks, and the finishing process. The appropriate requirements should be defined before tooling begins.
Design changes can increase the total project cost
Medical equipment designs may evolve during prototype testing, component integration, or regulatory development. Changes to mounting points, access panels, cable routing, and external dimensions can be expensive when they require modifications to a complex injection mold.
For this reason, the tooling decision should consider the maturity of the design, not just the estimated annual quantity.
Key takeaway: Before investing in a large injection mold, evaluate whether the enclosure needs complex molded-in features or whether its primary function is to provide a large protective and cosmetic shell.
2. When Should You Consider Thick-Sheet Vacuum Forming?
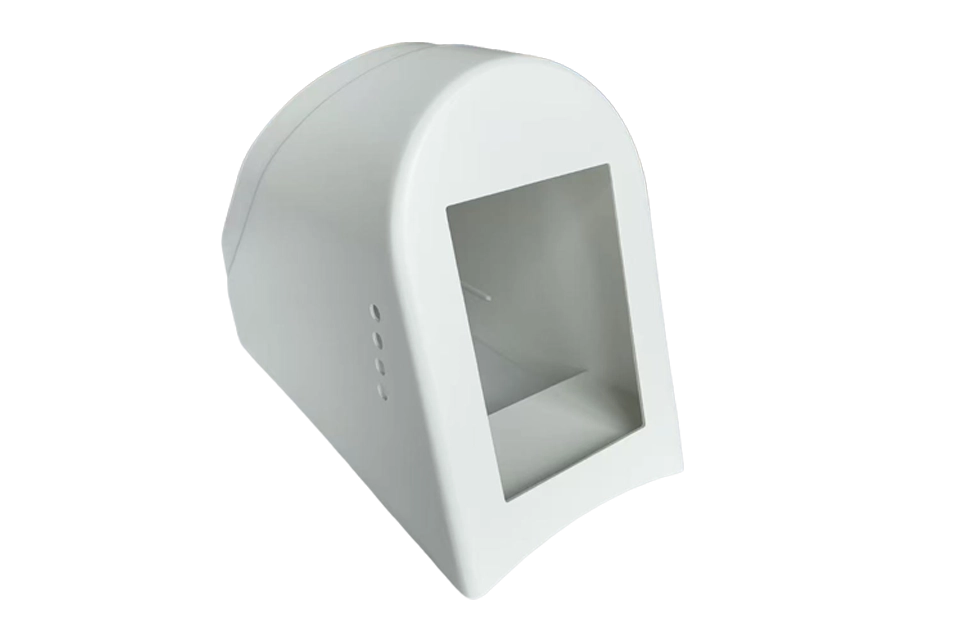
Thick-sheet vacuum forming, also known as heavy-gauge thermoforming, starts with a pre-manufactured plastic sheet. The sheet is heated until it becomes formable, drawn over or into a mold using vacuum pressure, cooled, and trimmed to the required shape.
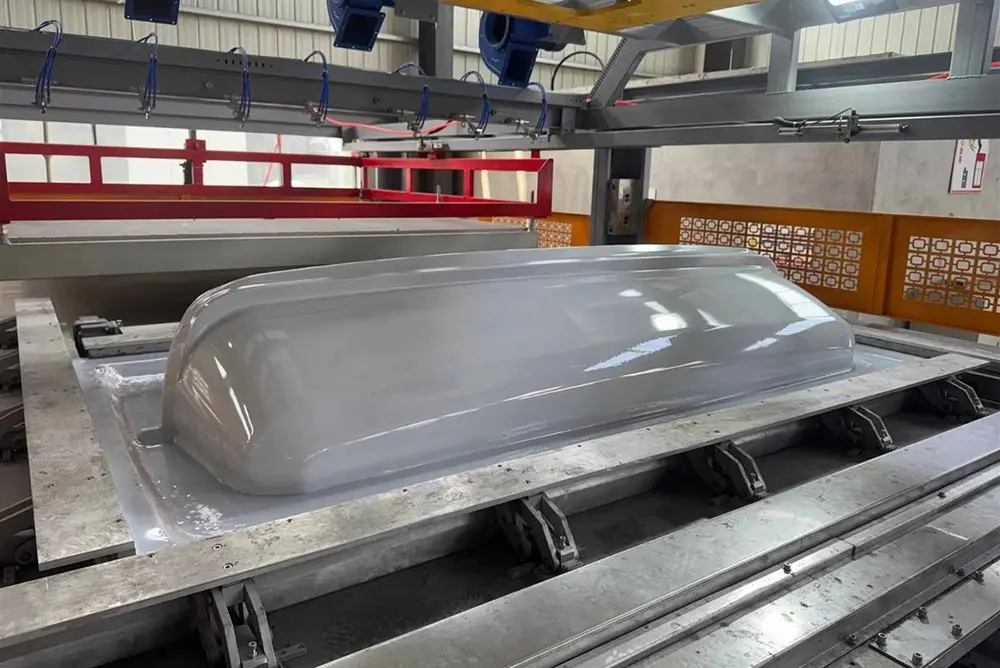
Compared with injection molding, this process typically uses a simpler, single-sided forming tool. That difference can reduce initial tooling investment for suitable large parts.
Applications that may suit vacuum forming
Thick-sheet vacuum forming is worth evaluating when the enclosure has the following characteristics:
- Large exterior dimensions: The part is a large cover, cabinet shell, equipment housing, or formed panel.
- Relatively simple geometry: The design consists mainly of curved surfaces, drafted walls, and broad exterior panels.
- Low or moderate production volume: The expected quantity may not justify a complex injection mold.
- A design that may still change: The project benefits from a simpler tooling approach during product development.
- Limited integrated molded features: Mounting points, brackets, and functional interfaces can be added through machining or secondary assembly.
- A suitable sheet material is available: The selected plastic can meet the appearance, impact resistance, chemical compatibility, and other application-specific requirements.
Examples include large equipment covers, medical workstation shells, diagnostic equipment housings, and selected mobile medical equipment enclosures.
Vacuum forming is not automatically the best choice for every large housing. Deep draws, narrow recesses, sharp corners, and complex surface transitions can create uneven wall thickness or forming difficulties. The design must be reviewed against the actual capabilities of the proposed process.
What does thick-sheet vacuum forming change about tooling cost?
A vacuum forming tool generally does not need the same type of enclosed core-and-cavity system as an injection mold. This can make the initial tooling investment more manageable for a large shell.
However, the final cost still depends on part size, draw depth, surface requirements, tool material, trimming fixtures, and the number of secondary operations.
A fair comparison should include the complete production route rather than comparing the vacuum forming tool with the injection mold alone.
Real-World Example: Manufacturing a Large Self-Service Health Screening Enclosure
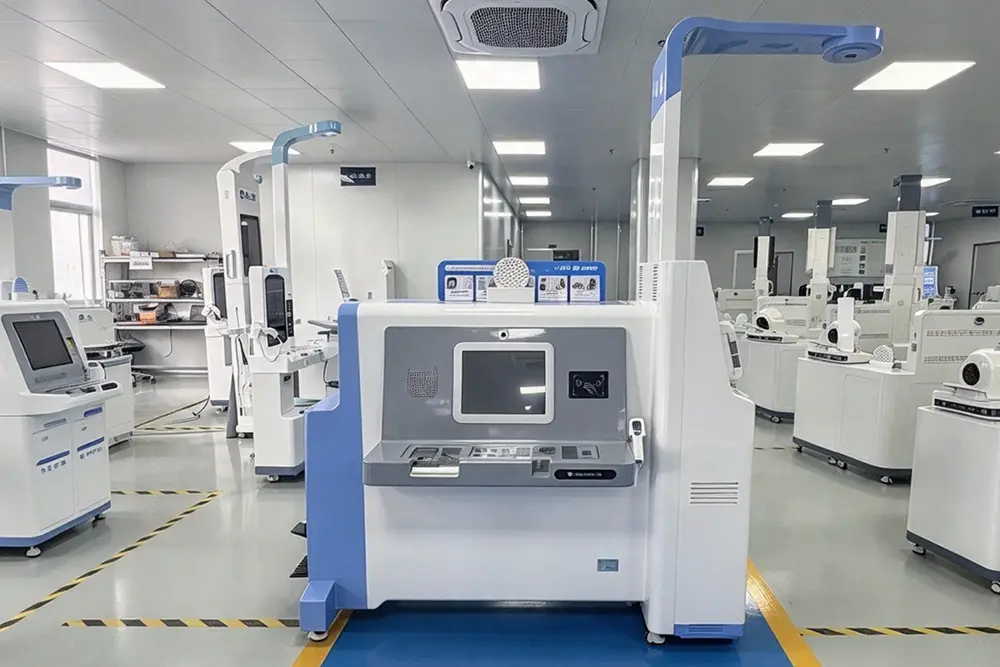
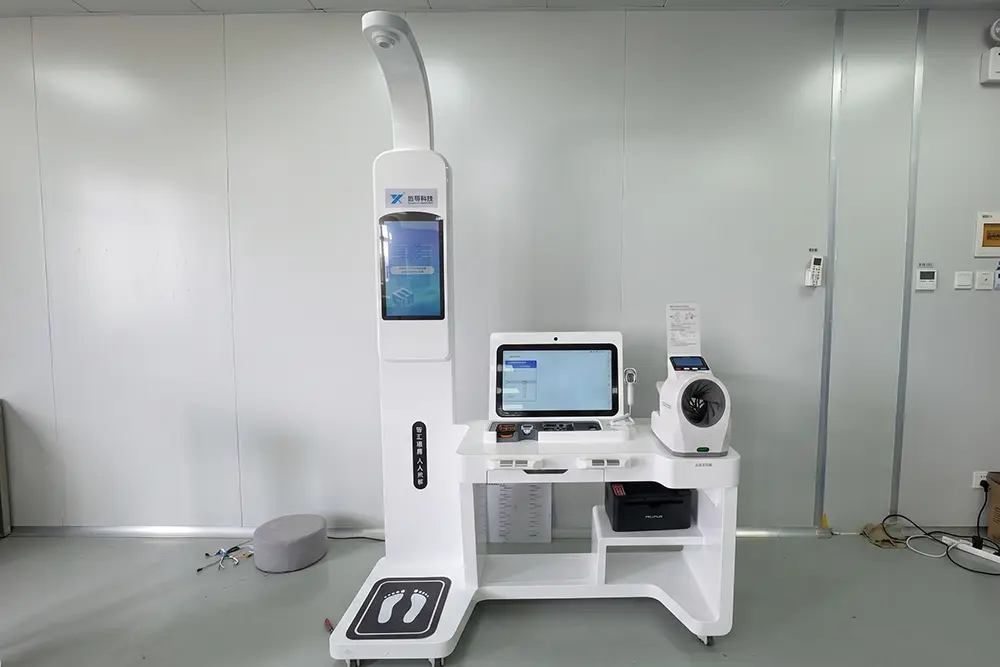
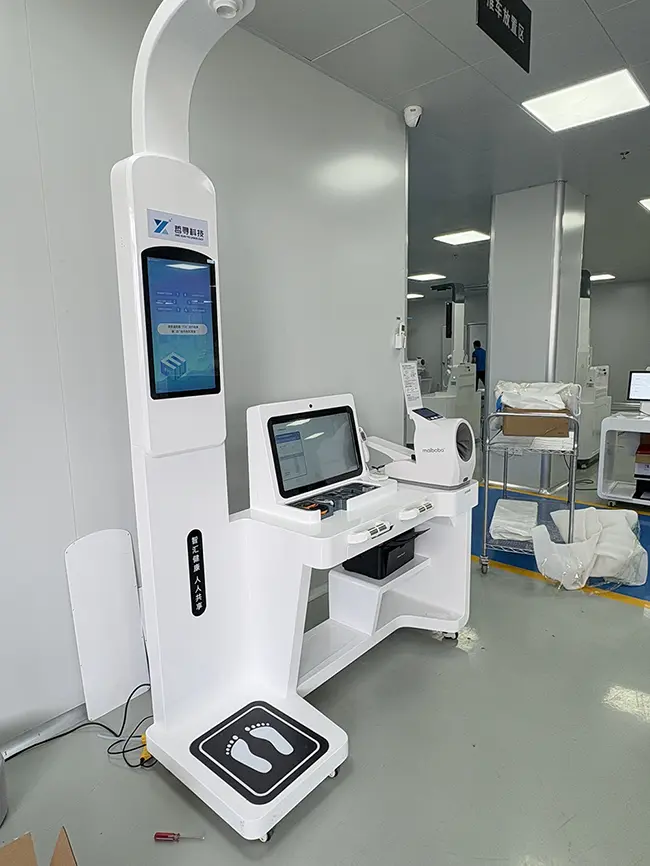
In one of our completed projects, we manufactured a large self-service health screening kiosk enclosure for a customer. The finished unit was approximately 185 cm tall, with a white exterior, a curved height-measurement arm, multiple display interfaces, and an integrated weighing platform.
Instead of relying on a single molded plastic shell, we used a hybrid manufacturing approach combining a SPCC cold-rolled steel support frame, CNC-machined ABS enclosure sections, and custom-machined acrylic signage panels.
This approach allowed us to accommodate the equipment’s large overall dimensions, complex curved surfaces, internal component mounting requirements, and multiple access openings without developing a single large injection mold for the entire exterior.
The enclosure was manufactured in small batches, completed assembly and surface finishing, passed the project’s structural and appearance acceptance checks, and was delivered to the equipment manufacturer. The finished equipment has since been put into use.
This project demonstrates why large plastic enclosure manufacturing should be evaluated at the complete assembly level. Depending on the design, CNC-machined plastic panels, metal reinforcement, and secondary assembly can provide a practical alternative to a fully injection-molded enclosure.
3. Vacuum Forming vs. Injection Molding for Large Housings
Both processes can manufacture plastic enclosures, but they differ in how they form the part and which features they can produce efficiently.
| Evaluation factor | Thick-sheet vacuum forming | Injection molding |
|---|---|---|
| Initial tooling | Generally lower for suitable shell geometries | Generally higher for large, complex molds |
| Large exterior surfaces | Often suitable for large shells and covers | Possible, but machine and mold requirements can be substantial |
| Integrated ribs and bosses | Usually require separate components or secondary operations | Can be molded directly into the part |
| Wall thickness | Varies as the sheet stretches over the tool | Controlled by the cavity design, with variation still possible from process conditions |
| Dimensional consistency | Depends on forming, cooling, trimming, and material behavior | Often better suited to repeatable molded-in features and controlled interfaces |
| Surface finish | Depends on sheet quality, tool surface, and forming conditions | Depends on resin, mold finish, processing, and part design |
| Design changes | May be simpler for suitable tooling designs | Can require expensive mold modifications |
| Production economics | Worth evaluating for low- to medium-volume shell production | Often attractive for high-volume production and feature-rich parts |
| Typical applications | Large covers, shells, panels, and housings | Integrated-feature housings, detailed components, and repeat production parts |
These are general tendencies, not universal rules. Actual performance depends on the part design, selected materials, manufacturing equipment, quality requirements, and supplier capabilities.
When a Hybrid Manufacturing Approach Makes More Sense
Our self-service health screening kiosk project illustrates another option for large medical equipment housings: CNC-machined ABS sections assembled over a metal support frame.
The enclosure incorporated several functional areas, including a vertical display window, a horizontal touchscreen opening, a printer mounting position, a blood pressure module location, cable routing spaces, and a load-bearing weighing platform.
The internal SPCC steel frame provided the structural support needed for the equipment layout, while the ABS sections formed the external housing and curved surfaces. Acrylic panels were manufactured separately for the side identification area.
For projects with this type of geometry, it is worth comparing three approaches:
- Thick-sheet vacuum forming with CNC trimming and secondary assembly
- CNC-machined plastic sections combined with a metal support frame
- Injection molding for suitable components or the complete housing, where production volume and geometry justify the tooling investment
The best choice depends on the required surface quality, structural loads, dimensional interfaces, expected quantity, and total manufacturing cost.
Part size and geometry
Vacuum forming can be attractive when the enclosure is large but primarily shell-shaped. It avoids some of the constraints associated with producing a large, complex injection mold.
Injection molding remains a strong option when the enclosure needs numerous integrated details, complex fastening features, or tightly controlled interfaces.
A large part is not automatically unsuitable for injection molding. The relevant question is whether the mold, machine, material, and production economics make sense for the specific design.
Surface finish and appearance
Both processes can produce professional-looking exterior surfaces, but the surface requirements must be evaluated differently.
For vacuum forming, the starting sheet, tool surface, heating conditions, material stretching, and trimming quality all affect the finished appearance. Deeply drawn areas may exhibit greater thinning or visible surface variation.
Injection molding offers greater freedom to integrate detailed surface textures and molded features, provided the resin, tooling, and process are designed appropriately.
For medical equipment, specify the acceptable color variation, gloss level, texture, visible parting lines, and any post-processing requirements before requesting a quotation.
Structural features and dimensional control
A vacuum-formed shell is not equivalent to a fully featured injection-molded structural component.
If a design requires load-bearing ribs, threaded bosses, precision mounting points, or complex internal interfaces, the manufacturer may need to add brackets, bonded components, fasteners, or a separate metal frame.
Injection molding may be preferable when those features must be integrated into the plastic part and reproduced consistently at scale.
For either process, identify the critical dimensions and interfaces separately from non-critical cosmetic surfaces. This helps the manufacturer determine where tighter tolerances are necessary and where normal process variation is acceptable.
Production volume and total cost
Vacuum forming can reduce the initial investment, but its per-part cost may be higher because of sheet material, trimming, labor, finishing, and assembly.
Injection molding usually requires more upfront investment, but the cost of the mold can be distributed across a larger production quantity. Automated production and integrated molded features may further reduce recurring costs.
There is no universal production-volume threshold at which one process always becomes cheaper.
A useful comparison is:
Total project cost = tooling + production + secondary operations + assembly + inspection + expected rework
To compare cost per usable part, divide the expected total project cost by the number of acceptable finished units.
For example, a lower-cost forming tool may be attractive for a limited product launch, while a more expensive injection mold may become the better investment when demand is stable and production volumes increase. Both scenarios require actual supplier quotations.
4. Which Features Still Require CNC Trimming, Metal Supports, or Assembly?
One of the most important considerations in large plastic enclosure manufacturing is the work required after the main shell has been formed.
Vacuum forming produces the general shape of the enclosure. It does not automatically deliver every hole, mounting interface, fastening point, or structural component required for a finished medical device.
CNC trimming for accurate openings and edges
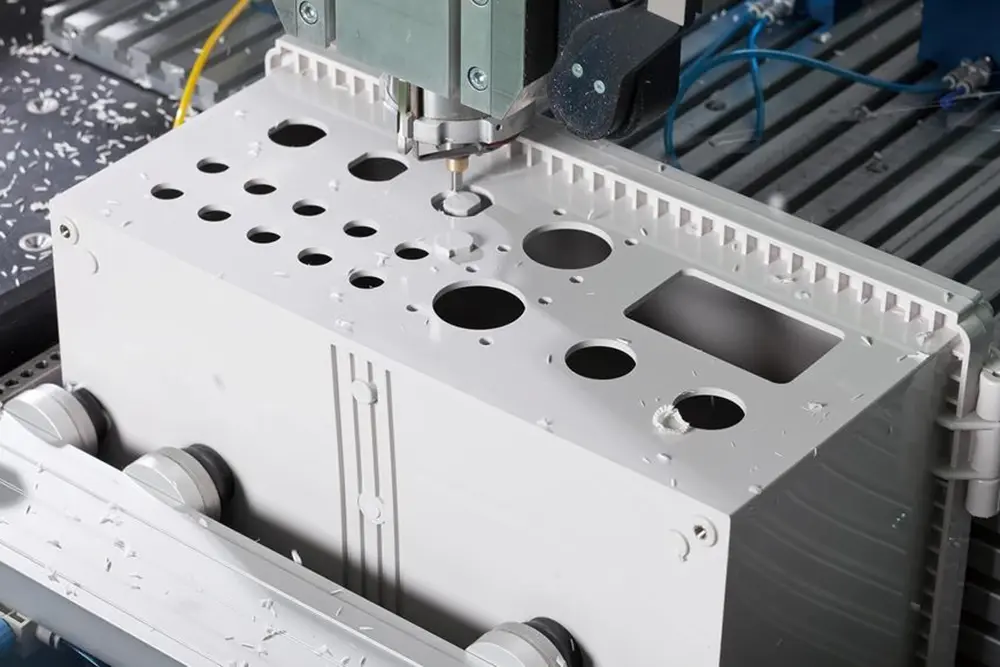
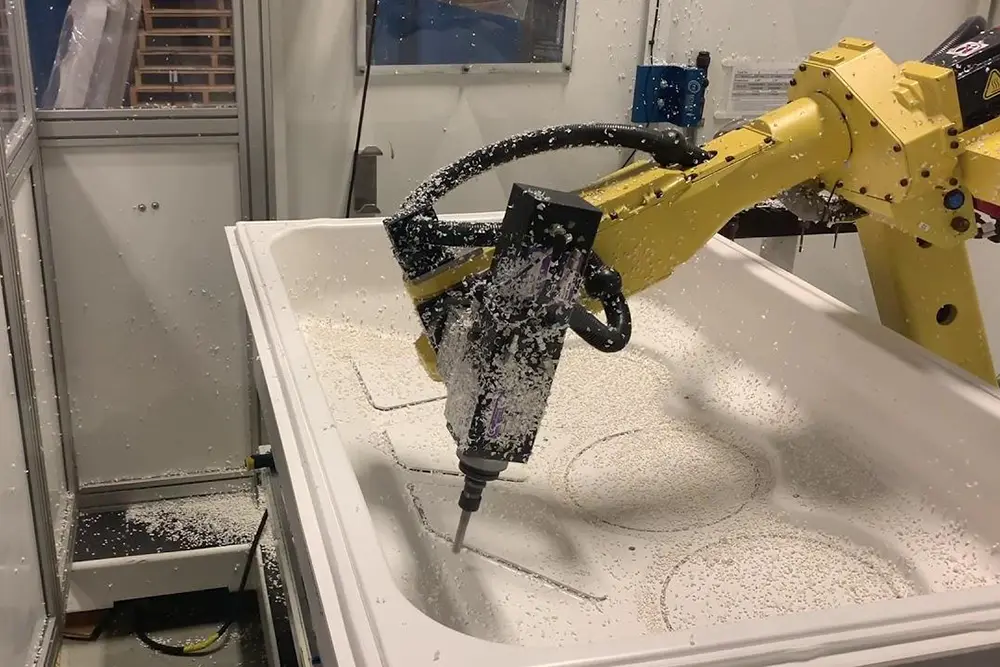
After forming and cooling, excess sheet material must be removed. CNC trimming can be used to create controlled edges, access openings, ventilation slots, connector cutouts, and other features.
It may also be used to finish interfaces that must align with internal components or adjacent panels.
The need for CNC trimming depends on the geometry and tolerance requirements. Some non-critical cuts may be completed using simpler fixtures, while more demanding interfaces may justify CNC machining.
Metal frames for structural support
Large plastic shells may need to support displays, control panels, electronic modules, internal equipment, or components exposed to repeated handling.
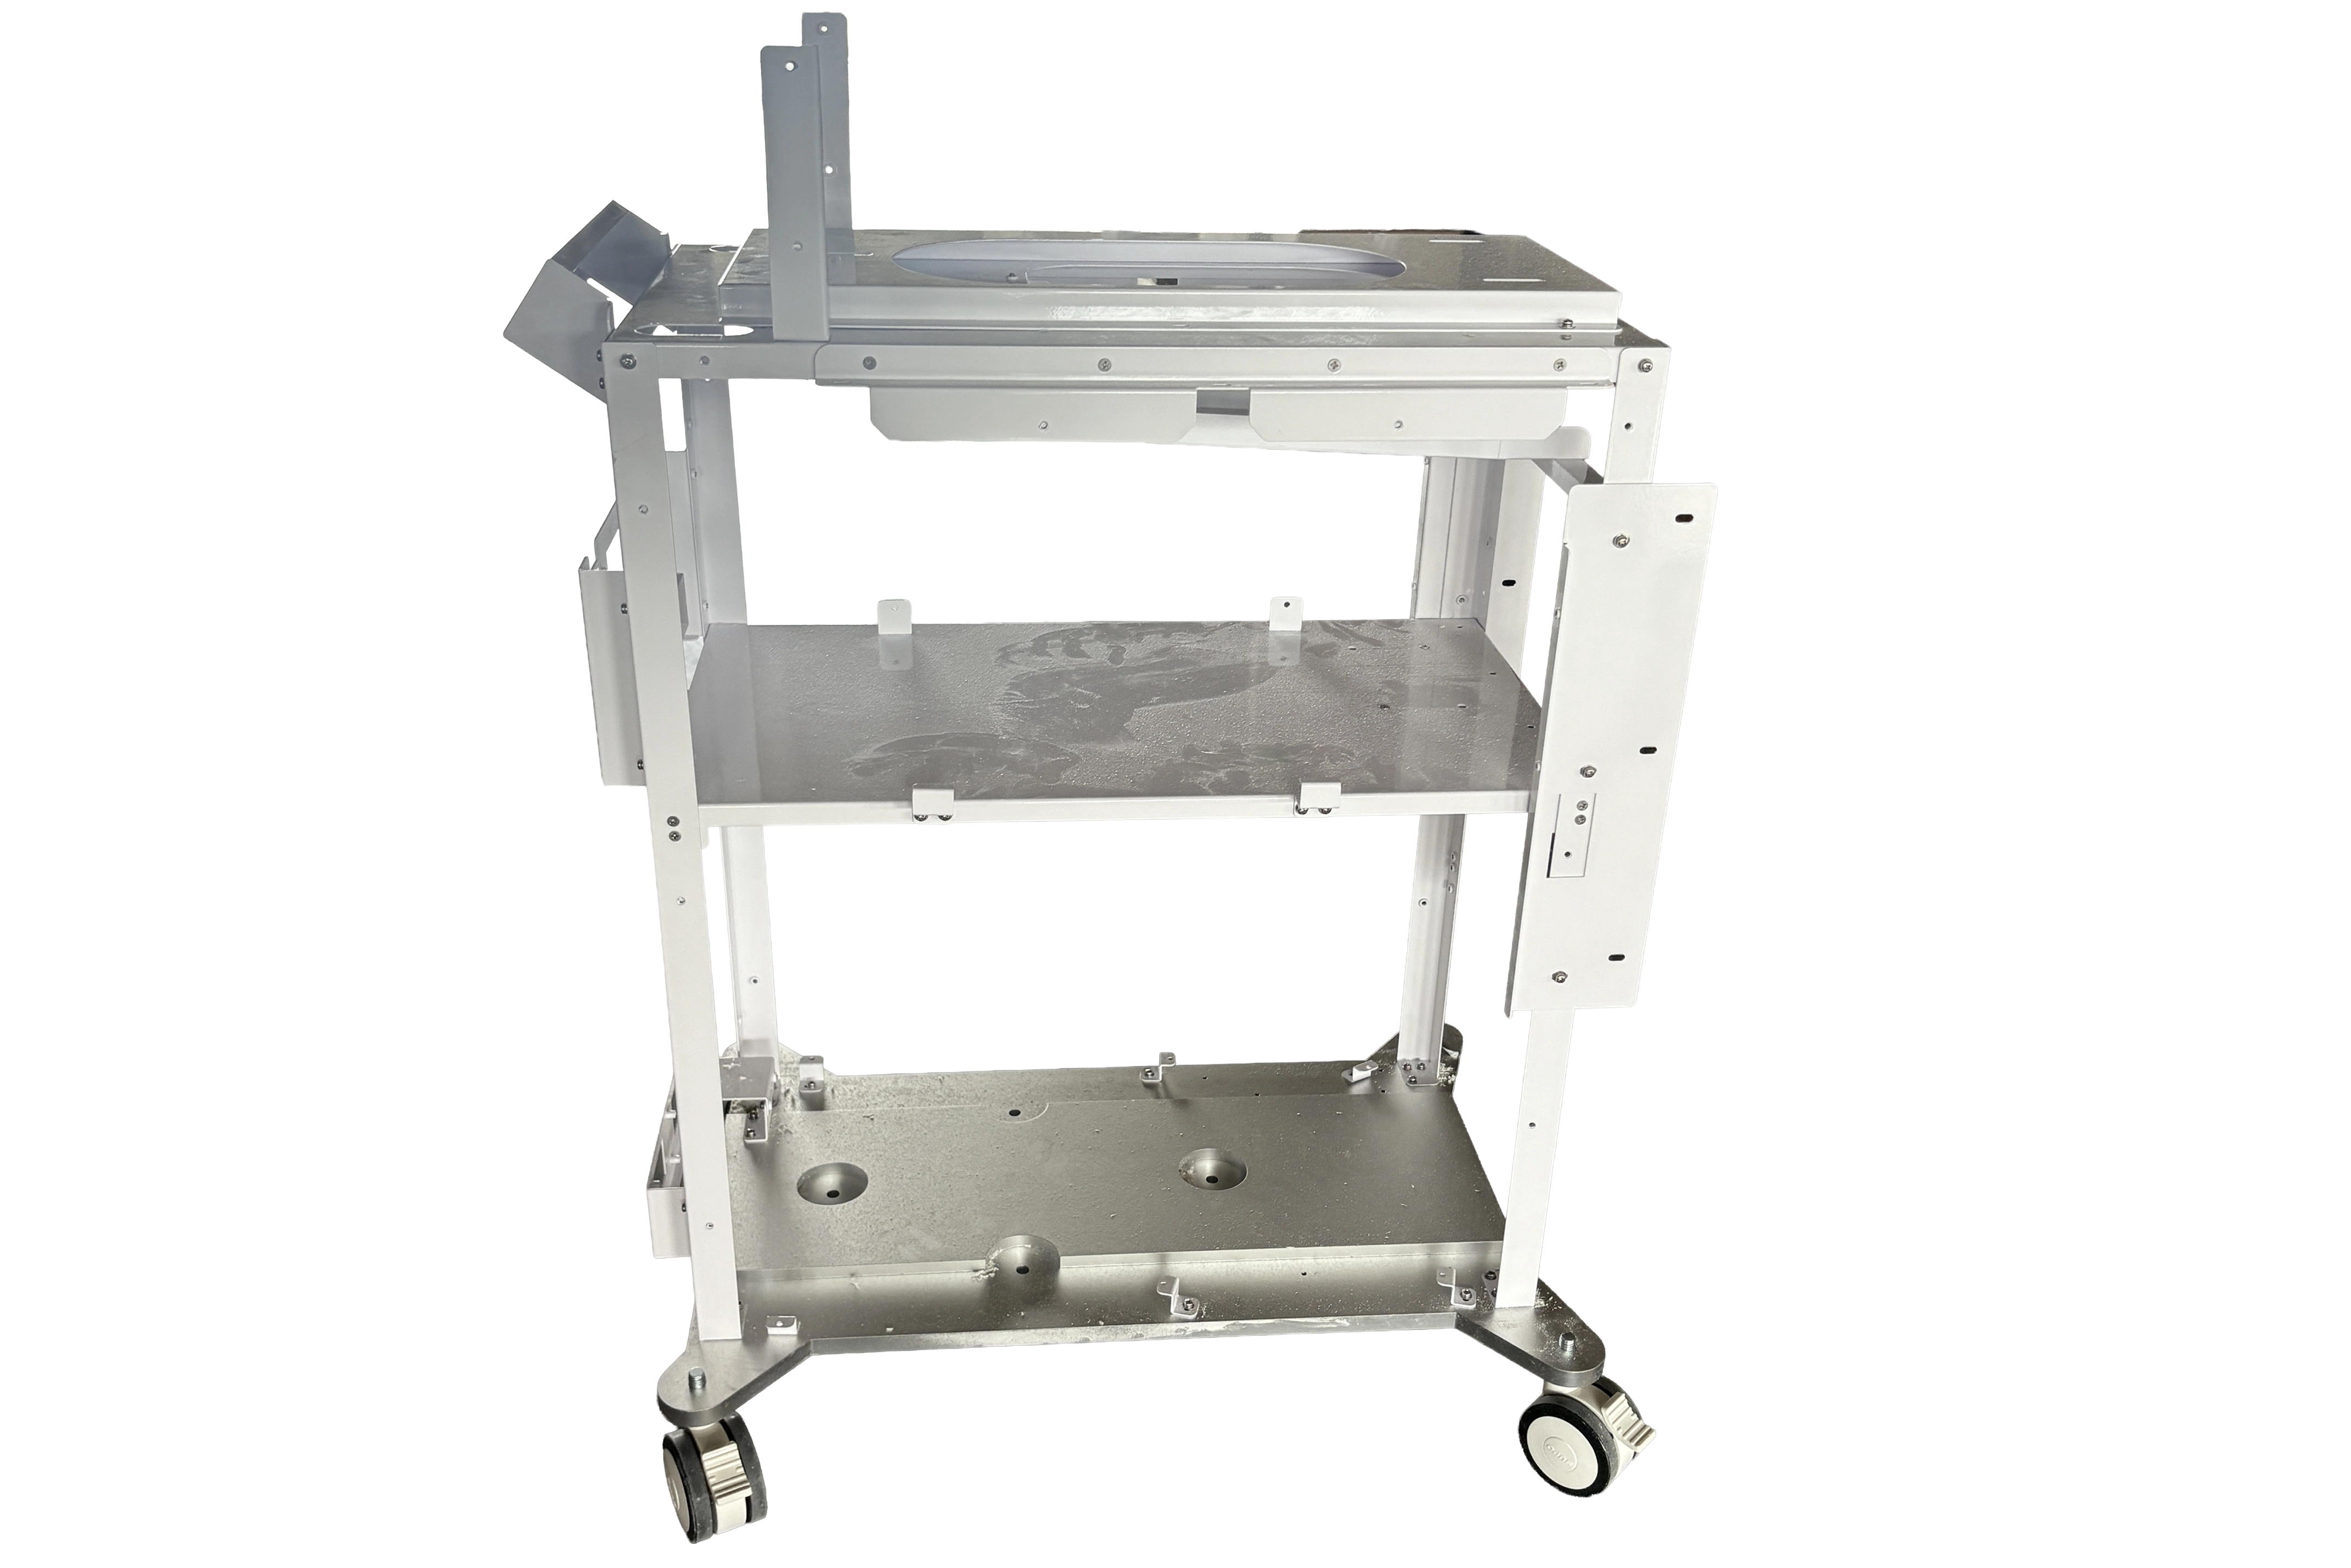
Where the plastic shell alone cannot provide the required stiffness or load capacity, a metal support frame or internal brackets may be appropriate.
A hybrid construction can separate functions:
- The plastic exterior provides the visible surface and protective shell.
- The metal frame supports loads and provides mounting interfaces.
- Internal brackets secure electronic or mechanical components.
- Fasteners and service panels allow assembly and maintenance.
The frame design should account for the load path, mounting locations, transport conditions, and access needed for service.
Engineering Challenges in a Large Multi-Part Medical Equipment Enclosure
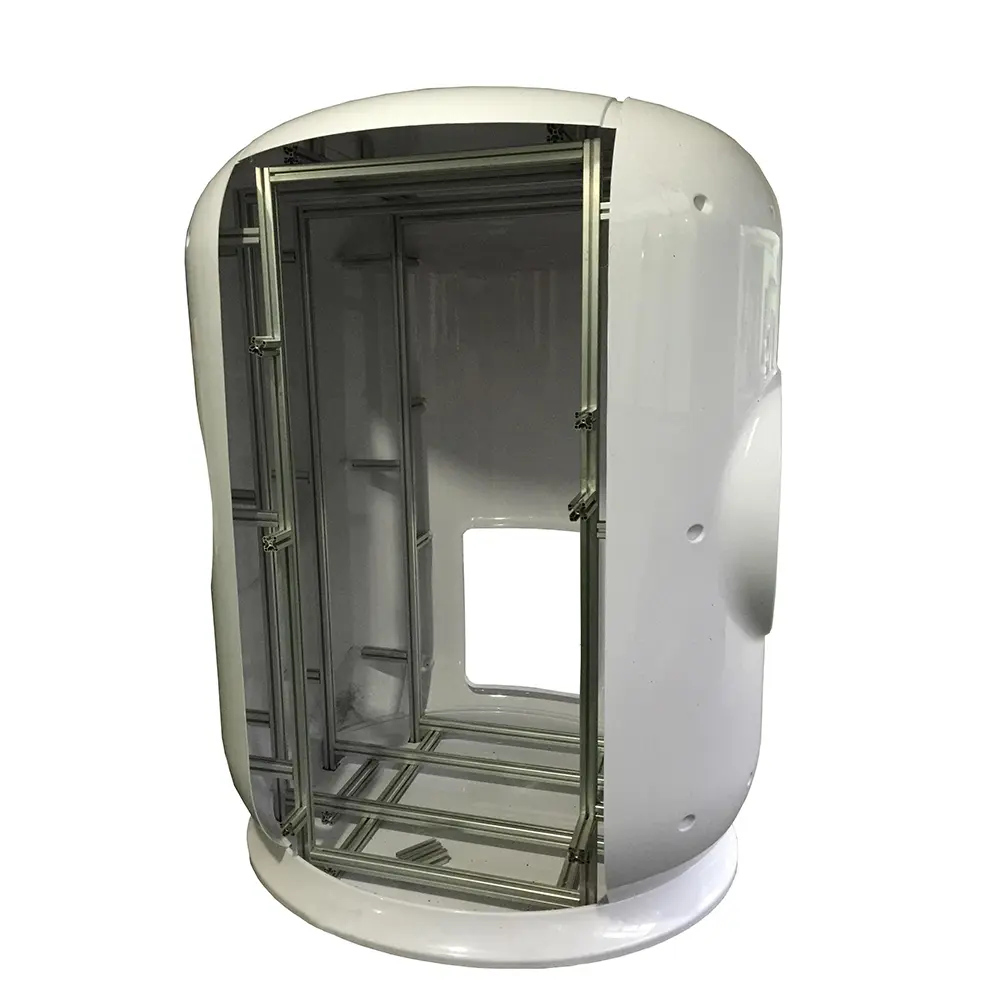
In our health screening kiosk project, the main engineering challenges were not limited to producing the exterior shape. The enclosure combined large ABS panels, a welded steel frame, curved components, acrylic signage, and multiple functional openings.
Our engineering and manufacturing team focused on several critical areas.
Steel frame alignment and load-bearing support
The SPCC frame had to support the curved height-measurement arm, vertical and horizontal displays, internal equipment modules, printer, and weighing platform. Welding distortion was controlled through frame correction and finishing, while the load-bearing structure and mounting interfaces were checked during assembly.
Consistent joints between separate ABS panels
The vertical column, curved arm, operation console, and weighing platform were manufactured as separate enclosure sections. CNC machining, bonding, gap filling, sanding, and surface leveling were used to achieve consistent transitions between components.
Precision openings and mounting interfaces
Display windows, ventilation openings, cable passages, equipment mounting locations, and acrylic sign slots needed to align with the internal structure and installed components. These features were checked against the assembly requirements before final acceptance.
Curved surfaces and paint quality
The long curved arm required careful handling during machining, sanding, and painting to minimize distortion and achieve a consistent semi-matte white finish. ABS-compatible primer and controlled low-temperature curing were used as part of the specified finishing process.
Serviceability and final assembly
The enclosure was designed to allow access to internal circuit boards and sensors for maintenance. The acrylic identification panel was installed after the main painting process to avoid paint contamination and to maintain a flush, secure fit.
These requirements show why large enclosure projects need coordinated design, machining, structural fabrication, finishing, and assembly—not just a process capable of producing the outer shell.
Secondary assembly and hardware installation
Depending on the design, the finished enclosure may require:
- Threaded inserts or fastening hardware
- Bonded or mechanically attached mounting features
- Hinges, latches, and access panels
- Cable routing features and strain relief
- Internal brackets and support structures
- Gaskets or seals where specified
- Surface finishing and protective films
These operations affect both cost and lead time. They should be included in the initial manufacturing review rather than treated as unexpected expenses after the shell is formed.
For a complete solution, evaluate the housing, support structure, machining, and assembly as one system.
5. How to Reduce Medical Equipment Enclosure Tooling Costs Without Compromising Quality
Lower initial tooling cost should not come at the expense of functional performance, assembly fit, or product reliability.
The following design and sourcing practices can help control project investment.
Define the critical requirements first
Separate essential functional requirements from cosmetic preferences.
For example, a connector opening or display interface may require controlled dimensions, while a broad exterior surface may allow a different tolerance. Defining these requirements clearly helps prevent unnecessary precision and avoidable tooling complexity.
Simplify the main shell
Where practical, use consistent draft angles, smooth transitions, and geometry suitable for the selected forming process.
Avoid adding complex molded-in features to a large cosmetic shell unless they provide a clear functional benefit. Some mounting features may be better handled by a separate bracket or internal frame.
Separate Cosmetic Housing Requirements from Structural Requirements
One lesson from our health screening kiosk project was the importance of separating the cosmetic enclosure from the load-bearing structure.
The exterior required smooth curved surfaces, uniform panel gaps, a consistent white semi-matte finish, and accurately fitted acrylic signage. At the same time, the equipment needed a stable internal frame to support displays, measurement modules, and the weighing platform.
We addressed these requirements through a combination of CNC-machined ABS sections, a welded SPCC steel frame, and separately manufactured acrylic panels.
For similar projects, buyers can reduce unnecessary tooling complexity by identifying which components need a high-quality cosmetic finish, which interfaces require precise machining, and which areas must carry structural loads.
This does not mean that a hybrid design will always be cheaper. The additional machining, finishing, joining, and assembly operations must be included in the quotation. However, comparing alternative manufacturing routes before committing to tooling can help identify a better balance between initial investment and finished-product requirements.
Evaluate the full assembly early
Review the enclosure alongside the display, power supply, electronic modules, cables, and internal support structure.
Early assembly planning can identify interference issues, inaccessible fasteners, weak mounting areas, and openings that would otherwise require expensive design changes later.
Choose materials according to the actual application
Material selection should account for impact resistance, stiffness, cleaning agents, surface appearance, operating temperature, and applicable safety or performance requirements.
ABS, PC, and PC-ABS may be candidates for different applications, but they are not interchangeable in every environment. The material grade and processing method must be evaluated against the actual requirements.
For further guidance, see our article on medical enclosure materials: ABS vs. PC vs. PC-ABS.
Plan for future production volumes
If demand is uncertain, it may be useful to evaluate a lower-investment process for early production and compare it with injection molding for the expected long-term volume.
However, changing processes later may require redesign, new tooling, and additional validation. The transition should be considered in the original product development plan.
The objective is not simply to select the cheapest tool. It is to minimize total manufacturing cost while meeting the enclosure’s functional and commercial requirements.
6. What Information Does a Manufacturer Need to Recommend a Process and Quote a Large Enclosure?
A qualified large plastic housing manufacturer should review the application, design, production expectations, and required finishing before recommending a process.
Providing the following information helps the engineering team evaluate manufacturability and prepare a more meaningful quotation.
1. Product drawings or 3D files
Provide a STEP file, engineering drawing, or other available CAD data.
If the design is not finalized, share the current concept, reference images, or preliminary dimensions. Clearly identify which features may change.
2. Overall dimensions and geometry
Include the approximate length, width, height, wall requirements, draw depth, and major openings.
Identify deep recesses, sharp corners, curved surfaces, mounting interfaces, and areas where material thickness or rigidity is especially important.
3. Material and appearance requirements
Specify the preferred plastic, color, texture, gloss level, visible surface requirements, and expected resistance to cleaning agents or chemicals.
If the material has not been selected, describe the intended operating environment and performance requirements so the manufacturer can recommend suitable candidates.
4. Structural and assembly requirements
Explain what the enclosure must support and how it connects to the rest of the equipment.
Include display sizes, electronic components, mounting points, cable openings, metal frame requirements, access panels, and any sealing requirements.
5. Critical dimensions and tolerances
Identify the dimensions that affect component fit, assembly, alignment, and performance.
Avoid assigning unnecessarily tight tolerances to every surface. Instead, specify the requirements for critical interfaces and explain how the enclosure will be assembled.
6. Prototype quantity and expected production volume
State the number of prototypes, initial production quantity, estimated annual demand, and expected product lifetime.
These figures are essential for comparing tooling investment against recurring production costs.
7. Quality, testing, and documentation requirements
For medical equipment applications, explain any applicable cleaning, chemical resistance, flammability, traceability, inspection, or documentation requirements.
Requirements vary by device and intended use. If the enclosure is part of a regulated medical device, identify the applicable project requirements rather than assuming that one manufacturing process or material automatically ensures compliance.
8. Target budget and project timeline
Share the expected tooling budget, target unit cost, prototype deadline, and desired production start date if available.
These constraints help the manufacturer compare feasible alternatives and identify trade-offs before detailed tooling work begins.
The more clearly you define the enclosure’s geometry, critical interfaces, production quantity, and functional requirements, the easier it is to assess whether vacuum forming, injection molding, or a hybrid manufacturing approach is the best fit.
7. How Zhongrongda Can Support Your Medical Equipment Enclosure Project
At Zhongrongda, we focus on custom medical and equipment enclosures, supporting projects from product development through manufacturing.
Proven Experience in Custom Medical Equipment Enclosure Manufacturing
Our manufacturing experience includes a self-service health screening kiosk enclosure developed for a customer and produced in small batches.
The approximately 185 cm-tall enclosure combined a SPCC cold-rolled steel frame, CNC-machined ABS panels, acrylic identification signage, and a multi-component assembly. Its design incorporated display openings, equipment mounting locations, cable routing, a curved sensor arm, and a load-bearing weighing platform.
The manufacturing process covered steel fabrication and welding, CNC machining, ABS surface preparation, painting, acrylic panel fabrication, final assembly, and finished-product inspection.
The completed enclosure passed the project’s structural and appearance acceptance checks and was delivered to the equipment manufacturer. The equipment has since entered service.
This project reflects our approach to custom enclosure manufacturing: evaluate the complete equipment structure, coordinate interfaces across different materials, and consider appearance, assembly, maintenance access, and structural performance together.
Our engineering-oriented approach considers more than the external shell. We evaluate the enclosure design, material selection, machining requirements, structural support, and assembly needs to help customers identify a practical manufacturing route.
For large medical equipment housings, the appropriate solution depends on the design and project requirements. A formed plastic shell with CNC-finished openings and a metal support structure may be worth evaluating for some applications. Other projects may benefit more from injection molding or a different manufacturing approach.
We recommend reviewing the complete product requirements before committing to tooling.
To discuss your project, prepare the available drawings or 3D files, overall dimensions, preferred material, estimated annual volume, and any critical appearance or assembly requirements.
Contact Zhongrongda to discuss your custom medical equipment enclosure project and request a manufacturing feasibility review.
A process recommendation should be based on your actual part geometry, quality requirements, production forecast, and total project cost—not on tooling price alone.
Frequently Asked Questions
Is vacuum forming suitable for large medical equipment enclosures?
It can be suitable for large shell-shaped enclosures with relatively simple geometry, particularly when initial tooling investment is a major concern. The design must still be assessed for draw depth, wall thinning, surface quality, structural support, and dimensional requirements.
Is thick-sheet vacuum forming cheaper than injection molding?
Vacuum forming generally offers lower initial tooling costs for suitable designs. However, trimming, finishing, hardware installation, and assembly can increase recurring costs. Injection molding may become more economical at higher production volumes or when complex features can be molded directly into the part.
Can vacuum-formed enclosures include mounting holes and connector openings?
Yes. Depending on the design, these features can be produced through CNC trimming, drilling, or other secondary operations. Critical openings should be dimensioned and inspected according to their assembly and functional requirements.
Can a vacuum-formed plastic shell support heavy medical equipment components?
Not necessarily on its own. If the enclosure must support heavy displays, electronic modules, or other loads, the design may need a metal frame, brackets, or reinforced mounting interfaces. Structural requirements should be reviewed before selecting the process.
What affects the tooling cost of a large plastic enclosure?
Major factors include overall dimensions, geometry, mold construction, surface requirements, material, tolerances, trimming fixtures, and production expectations. Injection molding tooling can also become more complex when the design includes undercuts, slides, or many integrated features.
What is the best manufacturing process for a low-volume large plastic enclosure?
There is no universal answer. Thick-sheet vacuum forming may be attractive for relatively simple, large shells, while CNC-machined parts, fabricated assemblies, or injection molding may suit other requirements. Compare tooling, recurring production, finishing, assembly, and quality costs before making the decision.